Project Design in the Digital Age
Contents
Project Design in the Digital Age
Introduction
While the scientific methods remained largely the same over the years the tools we employ have changed drastically in recent times. It is of course still possible to simply maintain a word document with all your ideas, notes, citations or i.e code snippets & statistics or to simply store your data and writing in whatever way feels comfortable for you, there have been a number of new tools and standards that will make your life much easier and allow you to be a more organized, more efficient scientist.
These new tools can be implemented in every phase of a scientific process, but are especially valuable in the initial stages of a project: Project Design.
Before we start..
This is chapter is an intorudction to the topic of project design and largely connects most of the course content, we’ll therefore be concentrating on the larger picture and only provide short introductions to most topics, while linking to in-depth sections. Following the steps in this chapter allows you to setup a professional indsutry standard research project.
The main content of this lesson consists of a Project design checklist, which you can follow step-by-step to setup your project. We further introduce digital tools that should make this process easier/more efficient.
It’s a good idea to generally skim the lesson, noting the structure and the separate steps of project design, before diving in. The lesson is quite long so remember to take breaks (e.g. after every or every second step of the checklist), don’t try to finish it in one session.
Roadmap
Goals
General considerations
Introduction to project design/setup
Project design checklist
Setup local folder structure (BIDS),
create an online folder structure (Github repo)
setup a project prsenece (OSF)
create a reference library (Zotero)
setting up a prgogramming environment
Data managment plan
Pre-registration
Additional materials
Goals
Specific goals of this first session will be to
gain a general understanding of the importance of project design
get familiar with process of setting up a project
provide a checklist to follow
get familiar with important tools and concepts for project design
General considerations: How to get started
Find a research question
At the start of each project there should be an initial question. These may appear due to obeservations of our surroundings or e.g. by expanding on already existing literature. The first step of every project should therefore involve turning our observations/thoughts into a well defined research question. Start of by scouring literature and find out more about the specific topic you’re interested in.
Following define your research question based on:
- what(topic, data modality)?
- how (method)?
- why (motivation)?
Types of research questions
It’s further necessary to evaulate if you’re questions relates to something quantifiable or if are you more interested in discovering or exploring the quality of a certain phenomenon.
A quantitative research question can be answered using numerical data and statistical analysis. They generally appear in 3 different forms:
descriptive: describe a phenomenon or group of people in detail (e.g. what is the prevalence of depression in hamsters?)
comparative: compare two or more groups or phenomena (“What are the differences in academic performance between students from academic and blue collar families?”
relationships: how do changes in one variable affect changes in another (“What is the relationship between social media use and the prevalence of eating disorders in teenagers?”)
A qualitative research question focuses more on exploring and understanding e.g. social phenomena, experiences, and perspectives in-depth.
They may be
open-ended, allowing the researcher to explore the phenomenon in-depth. For example, “What factors contribute to the success of mentoring programs in the workplace?”.They also may
seek to explore exeriences, or perspectives, e.g. “What is the experience of living with chronic illness?” orseek to explore processes, such as how something happens or how people make meaning of their experiences, e.g. “How do parents navigate the challenges of raising a child with autism?” or “What are the processes involved in the formation of a group identity among adolescents?They may further be
concerned with a description/exploration of the nature a specific context, such as a culture, community, organization, or group of individuals. For example, “What are the attitudes of young adults towards marriage in a conservative society?” or “How do employees experience the culture of a large multinational corporation?
Find out what you need to answer your research question
Next we’ll have to find out how to work out a compelling, convinicing answer to this reserach question.
Therefore we have to define the methods we want/need to employ. Ask yourself the following question:
Do you need to
collect new data or can you work with preexisting dataWhich
data modalityis necessary to answer your question, e.g. do i need survey data, reaction times or neuroimaging?What needs to be done with the data before you can analyse it?(i.e. quality control, data preprocessing (cleaning, descriptive statistics etc.))What
statistical analysisis necessary to answer my question (E.g. T-test vs. regression models vs. Machine learning etc.)?Which toolsare you going to need (software or hardware e.g. for data collection)Is this something you can manage
Solo, in cooperation with your local group/researcher or does the project involve international collaboration?What about
data protection, licensing and costs?
How do i find the information informing research questions and methods?
Both finding a solid research question and finding the necessary information on how to answer it involves doing a significant part of research. For guidance on this checkout our lesson on finding and evaluating data sources, published research & Literature review strategies.
Project design
Project design is mostly concerned with the initial process planing and organizing the framework to conduct reserach in. This might seem trivial, but is essential. It allows us not only to more deeply engage with our research question, but is also relevant for the reproducibility of a project.
An inidviudal project will surivive longer than the research that is done on it and will (potentially) influence the scientific consensus on a given topic down the line by providing data, insights or new methods. Therefore managing the presence and meticulously documenting what was done, what decisons were made and where the gathered information and data is stored is essential to the long-term impact of your work.
For this puprose the following chapters will explore how to setup a project in the “digital age”, what tools to use, what to look out for and where you may find more information. Don’t be discouraged if most of the tools used will be unfamillar to you as we will do our best to provide a short introduction and guide on their usage in the linked chapters.
The following checklist can be used as a guide on how to organize, store and connect all information and data relevant to your project. We’ll elaborate on each point in the lesson below.
Project design checklist
Setup local folder structure (BIDS),
create an online folder structure (Github repo)
setup a project prsenece (OSF)
create a reference library (Zotero)
setting up a prgogramming environment
Data managment plan
Pre-registration
We’re starting out local, by simply setting up our folder system to have an organized, deciated space to store all data relevant for our project.
1. Setup local folder structure (BIDS)
It is recommended to adopt a standarized approach to structuring your data, as this not only helps you stay consistent, but also allows you and possible collaborators to easily identify where specific data is located.
Your folder structure depends on your projects specific need (e.g. folders for data, documents, images etc.) and should be as clear and consistent as possible. The easiest way to achieve this is to copy and adapt an already existing folder hierarchy template for research projects.
One for example (including a template) is the Transparent project management template for the OSF plattform by C.H.J. Hartgerink
The contained folder structure would then look like this:
project_name/
    └── archive
    │   └──

    └── analyses
    │   └──
    │
    └── bibliography
    │   └──
    │
    └── data
    │   └──
    │
    └── figure
    │   └──
    │
    └── functions
    │   └──
    │
    └── materials
    │   └──
    │
    └── preregister
    │   └──
    │
    └── submission
    │   └──
    │
    └── supplement
        └──
Where project_name is of course the name of the folder containing your project information/data. One level lower we would following have dedicated folders to store all your e.g. paperwork, data or figures.
Adapting to specific datatypes: Neuroimaging
Working with neuroimaging data makes the setup of your system a little more complicated.
The most promising/popular approach structuring your data is the BIDS (Brain Imaging Data Structure) standard.
The Bids (Brain Imaging Data Structure) standard is a community-driven specification that aims to facilitate the organization and sharing of neuroimaging data. The Bids standard specifies a common format for storing and organizing neuroimaging data, including MRI, EEG, MEG, and iEEG. The standard can of course additionally be used to store bahvioral data.
The Bids standard defines a specific folder hierarchy for organizing neuroimaging data. This hierarchy is organized into several separate folders, each with a specific purpose. As Bids is mostly concerned with our data it provides a standardized way to organize the data folder in the diagram above. The data folder would then be structured in the following way.
data/
    ├── derivatives/
    └── subject/
        └── session/
            └── datatype/
/derivatives: contains processed data, such as the results of statistical analyses
/sub- folder: contains data from one subject. Each subject is identified by a unique code that starts with “sub-“. This folder contains subfolders for each imaging session, which contains separate folders for each imaging file (datatype in the diagram above) recorded for this specific subject.
Neuroimaging datasets mostly contain data from more than 1 subject, the data folder will therefore necessearily contain multiple subject folder, named sub-01, sub-02 ... sub-0n. This could look something like this:
project_data
    ├── dataset_description.json
    ├── participants.tsv
    ├── derivatives
    ├── sub-01
    │   ├── anat
    │   │   ├── sub-01_inplaneT2.nii.gz
    │   │   └── sub-01_T1w.nii.gz
    │   └── func
    │       ├── sub-01_task-X_run-01_bold.nii.gz
    │       ├── sub-01_task-X_run-01_events.tsv
    │       ├── sub-01_task-X_run-02_bold.nii.gz
    │       ├── sub-01_task-X_run-02_events.tsv
    │       ├── sub-01_task-X_run-03_bold.nii.gz
    │       └── sub-01_task-X_run-03_events.tsv
    ├── sub-02
    │   ├── anat
    │   │   ├── sub-02_inplaneT2.nii.gz
    │   │   └── sub-02_T1w.nii.gz
    │   └── func
    │       ├── sub-02_task-X_run-01_bold.nii.gz
    │       ├── sub-02_task-X_run-01_events.tsv
    │       ├── sub-02_task-Xk_run-02_bold.nii.gz
    │       └── sub-02_task-X-02_events.tsv

    ...
    ...
We’ll not go into detail about the differnt neuroimaging files here (the .nii.gz files), but there is another thing we can learn from this standard: The inclusion of metadata.
In the above diagram you find 2 metadata files:
The participants.csv file contains information on about the participants in the study, such as demographics, behavioral data, and other relevant information. Specifically, it typically contains a row for each participant and columns that describe various aspects of each participant, such as their age, sex, handedness, cognitive scores, and any clinical diagnoses.
The dataset_description.json contains important metadata about the entire dataset, such as:
Name: A brief and informative name for the dataset;
License: The license under which the data are released (e.g., CC-BY-SA).
Authors: A list of individuals who contributed to the dataset.
Funding: Information about the funding sources that supported the creation of the dataset.
Description: A detailed description of the dataset, including information about the data collection methods, study participants, and any relevant processing or analysis steps that were taken.
Subjects: A list of the subjects (i.e., study participants) included in the dataset, including information about their demographics and any relevant clinical information.
Sessions: A list of the scanning sessions or experimental sessions that were conducted for each subject, including information about the acquisition parameters and any relevant task or stimulus information.
Task: Information about the task or stimulus used in the experiment, if applicable.
Modality: Information about the imaging modality used to acquire the data (e.g., fMRI, MRI, MEG, etc.).
AnatomicalLandmarkCo
File naming conventions
The BIDS format also specifies how we should name our files. To make sure that e.g. others understand what content to expect in a specific file and to make it easier to use automated tools that expect certain file names for e.g. data analyses.
The general file naming convention looks like this:
key1 - value1 _ key2 - value2 _ suffix .extension
Where key-value pairs are separated by underscores (e.g. Sub-01-_task-01), followed by an underscore and a suffix describing the datatype (e.g. _events), which is followed by the file extension (e.g. .tsv). Resulting in:
Sub-01-_task-01_events.tsv
It’s recommended that you adopt this filenaming system and apply it to all of your files, e.g. your project report could be called:
firstname-lastname_project-report.txt
You may also want to add a date to non-data files (ideally in the year-month-day format (YYYYMMDD)), e.g.
YYYYMMDD_firstname-lastname_project-report.txt
Avoid adding descriptions such as version_01 or final_version etc., instead you should rely on digital tools with version history functionality such as Google Docs. In the next section we’ll further introduce the concept of a version control system to avoid this issue all together.
To learn more
Checkout our chapter on Data-management or the BIDS starter-kit
2. Github repo
Next we’ll setup a "Github repository". This is basically an online folder system mirroring your local file system, where you can store all your code, figures etc..
Github comes automatically with the version control system "Git", this allows you to keep track of every change in your files/filesystem and revert them when necessary. You can also use Git to keep track of local files.
You’ll find out how to do this in detail in the lesson: Version: GitHub
To learn more about the accompanying version control system for Git check out the following Lesson: Intro to GitHub
3. OSF presence
Next up we create an Open Science Framework (OSF) repository.
The OSF platform is designed to facilitate the collaborative and transparent sharing of research materials, data, and workflows. It boosts your works visibility and findability and makes your code and data accessible to others, therfore making your work more reporducible. An OSF - repository can be cited, using their automatic citation generator, which makes sure that your projects (even when no publication is in sight or sought) can reliably be shared, e.g. on your CV.
OSF further hosts local servers in e.g. Germany, meaning that it is much easier to adhere to data protection regulations when storing data on OSF.
The Chapter OSF - Manage your Research illustrates how to setup an osf repository and how to link this repository to the Github repository we’ve created in the previous step.
4. Zotero Library
Zotero is a free and open-source reference management software that helps you organize, store, and share their research materials. It further allows you to generate reference lists on the fly and has integrations for most word processing software, such as Google docs, and interacts seemlessly with literature search tool such as ResearchRabbit.
Zotero allows you to:
organize literature based on collections, libraries, groups, etc.
add notes, tags, annotations, etc. to your litearture
various sources of references: articles, books, website, etc.
browser & text editor plugin
manage citation
groub/organization level libraries online
infos for every paper in your collection regrading DOIs, PDF versions online, etc.
Setup a Zotero library
Follow the official Zotero installation guide to get a local version for your system
Open it, click on the
yellow folder symbolin the top left corner

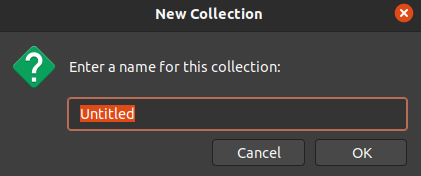
give your collection a meaningful name
now add articles, books etc. to your collection via the
Add Item(s) by Identifiderbutton, using doi, ISBN, PMIDs (Pubmed-identifiers) and so on

To now export your collection e.g. as a Bibtex file (for use with e.g. Overleaf, or to share with others) simply right-click on your
collection folderand selectexport collection

to create an APA formatted reference list right-click on your
collection folderand selectCreate Bibliography from collection, select the APA format, a language and an output mode, e.gcopy it to your clipboardand simply paste it into a document of your choice

Use Zotero online
Next up we want to synch our local collection with an online presence to easily access our literature from everywhere in the world or to share it with collaborators
To do this:
create an Zotero account
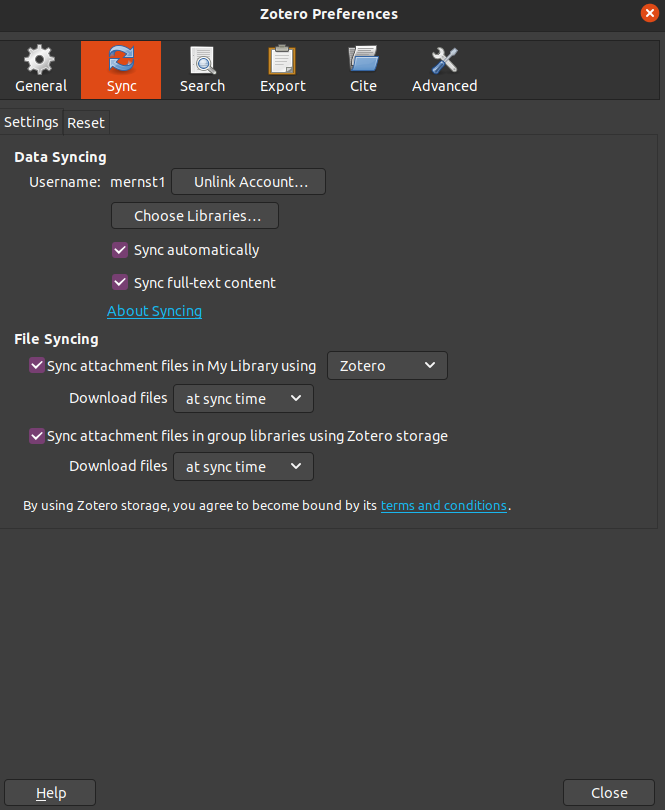
next in your local zotero installation, open the preferences by clicking
“Edit → Preferences”for Windows/Linux or “Zotero → Preferences” for Mac.select the
Syncpanel and into the account detials you’ve used to create your online account and clicksynch account

Now simply select which libraries, files etc. to synch
if you now log into your zotero online account and click on
web libraryyour synched libraries will apear in an window with the same capabilities as your local installation

Zotero Connector
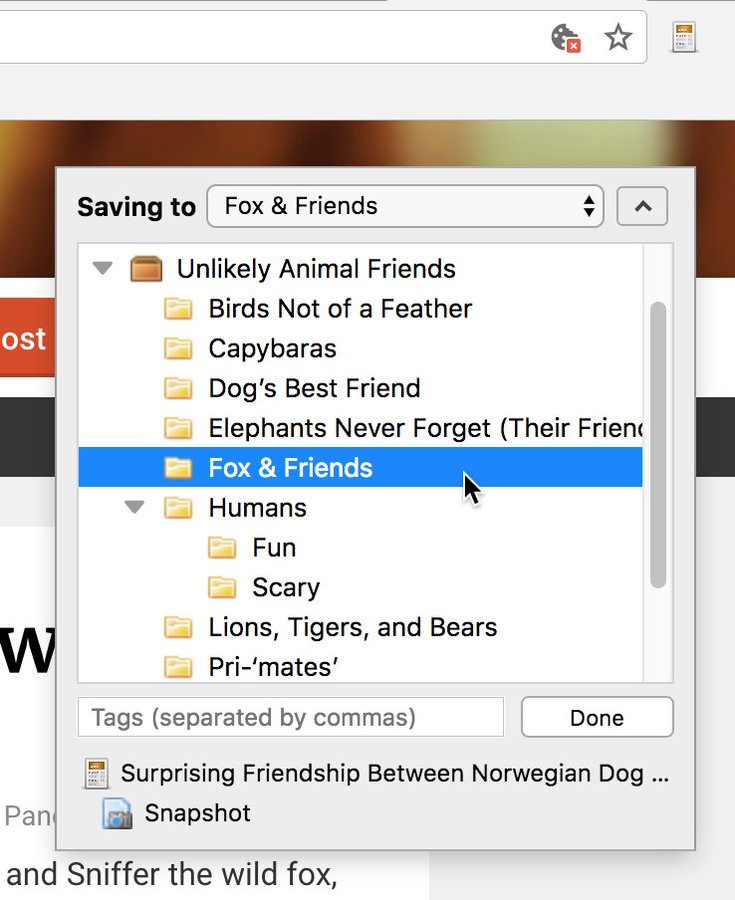
If you want to make your life even easier, you can further install the Zotero Connector for your respective browser.
Click on the zotero symbol in your browser (usually on the top right) and a menu will pop up allowing you to either save citable screenshot of a website or an article reference (including PDF download when possible) into one of your colllections
5. Setting up a prgogramming environment (i.e. “virtualization)
If you’re doing reserach you will necessarily need to learn how to programm, e.g. to organize and clean your data or to do statistical analyses.
To make sure that you’ve got all the prerequisites installed for your respective need it’s customary to use a package and environment management system. This is commonly done using conda.
Conda
Conda is an open-source package and environment management system that simplifies the process of installing, managing, and organizing packages and dependencies. Conda supports a multitude of programming languages such as Python and R.
One of the most important functions of Conda is creating and managing isolated environments. An evniroment in this case specifies the specific packages and their versions installed for a speific project. Programming packages are the same as other software such as e.g. Word or Excel. As every new Excel version adds new functionalities or slight changes to how the programm works, so are there changes in the packages of programming languages like Python. Python uses packages such as Numpy for mathematical operations, but with new Numpy versions the way certain calculations are done may change, e.g. to make the program more efficient or stable.
Should changes like this occur it becomes hard to reproduce the results of earlier research. Therefore conda allows us to specify which packages and what version of these packages was used for a certain project. This information is stored in an enviornment file. Other researchers can following use this enviornment file to reproduce the exact same analyses. Thus making the original work reproducible.
It’s recommended that one creates a separate environment for each project or application, with its own set of dependencies and packages, so as not to interfere with other environments or the system itself.
Working with Conda
There are multiple ways how you can install a working conda version.
Anaconda:
The full Anaconda installation comes with a web-like Graphical User Interface. This unfortunately meand that the installation if fairy large (larger than 2 GB).

Anaconda can be installed following the official installation guide
To create an enviornment open the Anaconda application and click on the enviornments view on the left side, then click the create button in the bottom left, give your enviornment a descriptive name matching your project and select a Python or R version.

To use an enviornment, clik the arrow button next to the environment name to open the activation options dropdown and select Terminal, Python interpreter, IPython Console, or Jupyter Notebook.

This will open the interpreter of your choice and which will allow you start writing code.
To find out more about interpreters checkout the Learn to code - the basics chapter. To learn how to start programmin in Python visit the Intro to Python chapter.
To clone or backup and share an enviornment use the respective buttons at the bottom of the enviornments list.

Additional material: Anaconda
Find out more using the following ressources:
Miniconda
Or the much more lightweight conda installation, which requires you to use the Command-Line-interface or Shell of your system. Unix systems such as Linux and Mac already come with Shell preinstalled.
To learn more aboute Command-Line-interfaces checkout the Learn to code - the basics chapter. To learn how to work with the Shell you can also follow the “Intro - The (unix) command line: BASH” chapter
You can install conda by following the Conda installation instruction for your System.
Open a shell:
Ubuntu:
To open a Shell in Ubuntu click on Activities in the top left of your screen, then typing the first few letters of “terminal”, “command”, “prompt” or “shell” and select the terminal application.
Mac:
On Mac click the Launchpad icon in the Dock, type Terminal in the search field, then click Terminal.
Windows:
Windows users will have to download the Windows-subystems-for-linux (wsl) application, this will install a Unix subsystem which will allow you to work with the bash shell. Simply follow e.g. the Foss Guide: Install bash on windows. Afterwards search and open the newly installed Ubuntu apllication.
Generate an enviornment file using conda
To create an enviornment file and install packages in it. Copy the following into your Shell and hit Enter
conda create --name my_project_enviornment
where the conda create tells your shell to creat a new enviornment, the --name specifier allows us to name our enviornment. In this case an enviornment using the most recent Python version with the name my_project_enviornment would be created.
Conda will then prompt you to confirm the creation of the enviornment: Proceed ([y]/n)?
Type “y” and press enter to proceed.
To use the new enviornment copy the following into your shell and hit enter:
conda activate my_project_enviornment
To install a new package use the conda install command, e.g. to install the jupyter package:
conda install -c anaconda jupyter
To install multiple packages just add the one after another to your command, e.g.:
conda install -c conda-forge -y numpy pandas matplotlib scipy scikit-learn jupyter jupyterlab
Now you can export your enviornment as an enviornment file by using the following command in your shell:
conda env export > enviornment.yml
This will create a YAMLfile, a text document that contains data formatted using YAML (YAML Ain’t Markup Language) in the location that you’re terminal is opened in (e.g. ~/Desktop). If you open it with a text-editor of your choice it will look something like this:

Where in this case mne is the enviornment name, channel: conda-forge indicates that the enviornment was created by downloading packages from the conda-forge server (called channels), and under dependencies: you’ll find the list of packages and for some the specific package version (e.g. python>=3.8) specified.
This file can be shared with others or used to recreate the same environment on another machine. So if someone would want to reproduce this enviornment, they would simply have to copy this enviornment file and use the following command in a terminal:
conda env create -f enviornment.yml
Additional material: Miniconda
To learn more about conda and how to work with environments check out the following resources:
(Youtube) Coding Professor - The only CONDA tutorial you’ll need to watch to get started
6. Data Management Plan
An initial step when starting any research project should be to setup a data managment plan (DMP). This helps you to flesh out, describe and doucment what data exactly you want to collect, what you’ll be doing with it, where and how it’s stored and eventually shared.
A DMP helps you stay organized and reduces the potential of suprises in the future (e.g. due to too limited data storage capacities or e.g. unexpeted costs). It is at times also required by e.g. your University or agencies funding research endeavours.
Most universites provide either templates, tools or guidance on how to create a DMP, so it is a good idea to check the online presence of your university or get in contact with your local libary.
For the Goethe University Frankfurt researchers can use the following tool: (german) Datenmanagementpläne mit dem Goethe-RDMO
There are also public tools to collect and share DMPs, such as DMPonline for the UK.
Here you also find publicly published plans that you can use to check what your DMP could/should contain.
The Turing way Project lists the following considerations when creating a DMP. Many of the specific points of this checklist have been already discussed in the previous steps.
Turing way DMP checklist
1. Roles and Responsibilities of project team members
- discuss who is repsonscible for different tasks related to project/data managment
- e.g. who is responsible to maintain the dataset, how takes care of the research ethics review
2. Type and size of data collected and documentation/metadata generated
- i.e. raw, preprocessed or finalised data (lead to different considerations, as e.g. raw data can generally not be openly shared)
- expected size of dataset
- how well is the dataset described in additional (metadata) files,
    - what abbrevations are used, how are e.g. experimental conditions coded
    - where, when, how was data collected
    - description of sample population
3. Type of data storage used and back-up procedures that are in place
- where is data stored
- data protection procedures
- how are backups handled, i.e location and frequency of backups
- will a version control system be used?
- directory structure, file naming conventions
4. Preservation of the research outputs after the project
- public repositories or local storage
- e.g OSF
5. Reuse of your research outputs by others
- code and coding environment shared? (e.g. GitHUB)
- conditions for reuse of collected dataset (licensing etc.)
6. Costs
- potential costs of equipment and personell for data collection
- costs for data storage
To create your DMP you can either use the discussed tools or create a first draft by noting your toughts/expectation regarding the above checklist in a document.
Additional material
Find out more about how to organize and store in the chapte on Data managment
(Youtube) University of Wisconsin Data Services - Data services playlist
7. Pre-registration
„The specification of a research design, hypotheses, and analysis plan prior to observing the outcomes of a study“ Nosek & Lindsay (2018)
A pre-regsitration is a time-stamped record of your experiment design, methods, planned analysis that is publicly available (can be done either before you collect data or before you begin analysis). A pre-registration can be either done e.g. in correspondence with your advisor or via online platforms. You can even apply a pre-registration for bachelors or masters theses.
Using an online platforms is strongly recommended as this increases reproducibility and trust in your work. The two main platform providing tools to pre-register your study are:
A pregrestration on e.g. AsPredicted can remain private until an author makes it public or e.g. remains private forever (but can still be shared with journals, funding agencies etc.).
Advantages
separation of confirmatory & exploratory research (you can do both, just be honest & state everything)
you cannot fool yourself due to decreased flexibility in data management & analyses
closer to the scientific approach: make predictions about the world and investigate if they hold up
helps your research stay focused and organized
increases reproducibility
at times required by funding agencies
How to preregister a study
Using the above mentioned platforms it is increasingly simple to write a pregesitration. Simply head on over to e.g. AsPredicted and click the create button. If you’re just trying things out you can select the box: Just trying it out; make this pre-registration self-destroy in 24 hours..

Next, input your e-mail adress and register your account. Following the login link you’ll be sent to Creating a New Pre-Registration page. Here simply add all the project/study authors:

And following answer the study related questions:

Once done, click preview to get an overview about how your pregistration would look like. If everythin seems correct click approve. You’ll be sent an e-mail confirmation and can now look up your pre-registered study under your account by selecting See your pre-registrations:


Additional materials on pre-registration
(Youtube) OSF: The What, Why, and How of Preregistration
OSF Guide: Creating a preregistration
TLDR
Let’s summarise!
We’ve established that project design is an essential step in scientific work. Remember that **an inidviudal project will surivive longer than the research that is done on it and will (potentially) influence the scientific consensus on a given topic down the line by providing data, insights or new methods.
We therfore design our projects to maximize reproducibility, by following the FAIR principles, i.e by increasing the Findability of our work (e.g. via OSF), the Accesebility (of our data and code), the Interoperability of our analyses (via setting up and sharing environment files) and the Reusability (e.g. by prociding adequate documentation and description of our datasets and sharing our code via GitHUB).
We further learned to organize our project by setting up a Data Management Plan, and how to establish our project on a local level (i.e. creating a standardized ofile and data systems), as well as online (via GitHUB, Zotero, OSF. Additionally we learned how to pre-register studies and why this is a good idea!
Remeber to use the project design checklist for your future endeavors:
Project design checklist
Setup local folder structure (BIDS),
create an online folder structure (Github repo)
setup a project prsenece (OSF)
create a reference library (Zotero)
setting up a prgogramming environment
Data managment plan
Pre-registration
Goals
Did we meet our goals?
gain a general understanding of the importance of project design
get familiar with process of setting up a project
provide a checklist to follow
get familiar with important tools and concepts for project design
Where are we now?
Please take a moment to reflect on the lesson:
1. Have you gained a general understanding of the importance of project design?
2. Which of the seaparte steps of the project design seems the most important to you
3. Do you believe that you’ll implement some of these steps into your future work?
4. Are there any steps that you feel are less imporatant or harder to implement?
5. Why is that? Which information do you feel you’d still need to implement these steps?
6. What was the most surprising part of the lecture for you? What information in particular stood out to you?
7. What tool did you find especially interesting/usefull?
Homework, Excercises and ressources
Additional materials
Acknowledgments
The go-to ressource for creating and maintaining scientific projects was created by the Turing Way project. We’ve adapted some of their material for the Data Managment Plan section of the lesson above.
The Turing Way Community. (2022). The Turing Way: A handbook for reproducible, ethical and collaborative research (1.0.2). Zenodo. https://doi.org/10.5281/zenodo.7625728
Transparent project management template for the OSF plattform by WEC.H.J. Hartgerink
We’ve adapted some of the directory structure diagrams form the BIDS Standard Guide.
References
Nosek, B. A., & Lindsay, D. S. (2018). Preregistration becoming the norm in psychological science. APS Observer, 31.